|
|
Getting Started
FaceBook Store
 Watch Introduction Video
Toggle detailed instructions on how to add SalesCart App
Watch Step-by-Step Getting Started Video
Adding SalesCart App to Facebook
You need a Facebook Account
If you don't have one, and need a Facebook account, click here to create one.
SalesCart uses Facebook as a "hosting container" to display your online store anytime with/without a website or hosting. You can always add your store to a website later but you will maintain your store independently of your hosting in the cloud. There are lots of advantages to this.
| What you are doing | Instructions | |
|---|---|---|
 Click Here for Larger Image |
Create a Facebook Account by clicking here.
|
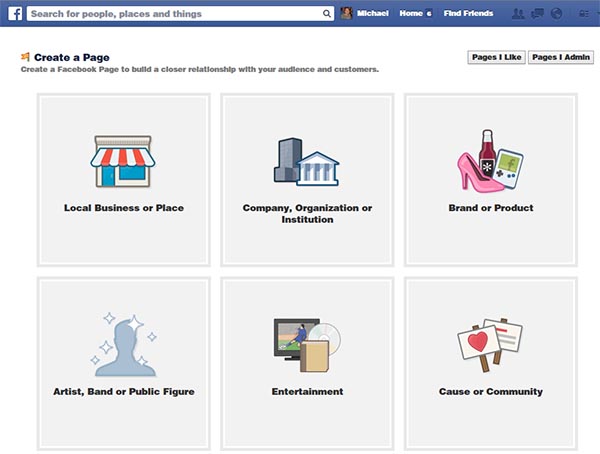
Create a Facebook Page for your Store
If you don't have a separate Facebook Page for your company, click here to create that now.
In addition to your personal Facebook account, you need a separate Facebook Page ("container") to contain your store. In Facebook, this is called a Business Page rather than an account or personal page. It operates similar but has lots of other features. This will keep your private facebook account information separate from the public information of your business and store. A business page also has lots of other features that are important to open your page to the public but still being able to control it that a personal page doesn't have. Also a personal page has lots of other things that don't apply to a "business" that keep the business page much cleaner. You also cannot customize or create new tabs on a personal page.
| What you are doing | Instructions | |
|---|---|---|
 Click Here for Larger Image |
Create a Facebook Page by clicking here.
|
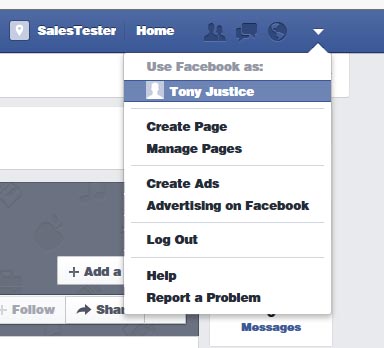
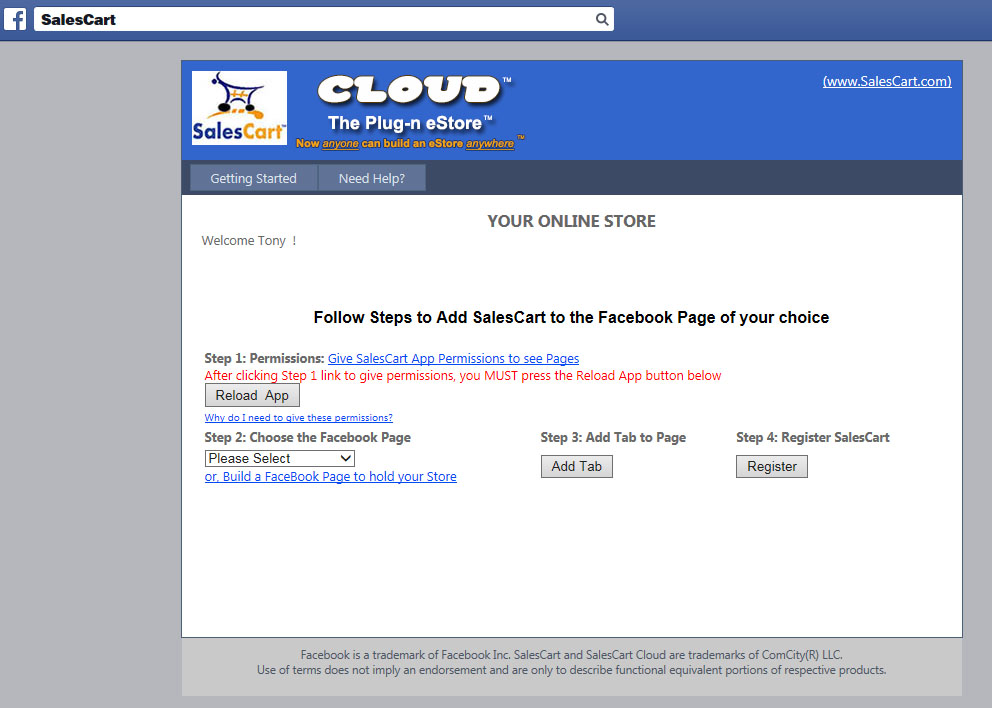
Add the SalesCart App to Facebook
Next, add the SalesCart App to your Facebook user account by following the instructions below †. You will go here to create your store, administer your store, and view your store. You will also add a tab to your new page for the user to shop from. When you customers go to this tab, they only see your store and the products you sell.
| What you are doing | Instructions | |
|---|---|---|
 Click Here for Larger Image |
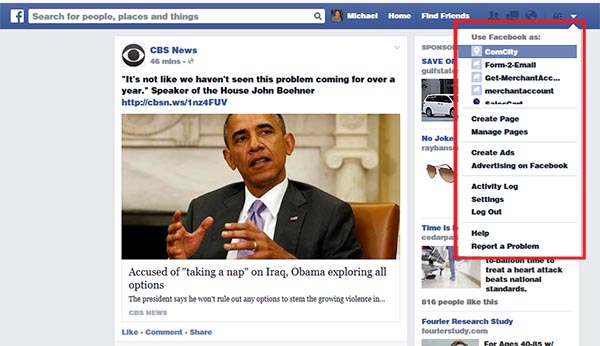
Make sure you are NOT using Facebook as your new Page.†
|
|
 Click Here for Larger Image |
Add the SalesCart app to your Facebook Account by clicking here.†
|
|
 Click Here for Larger Image 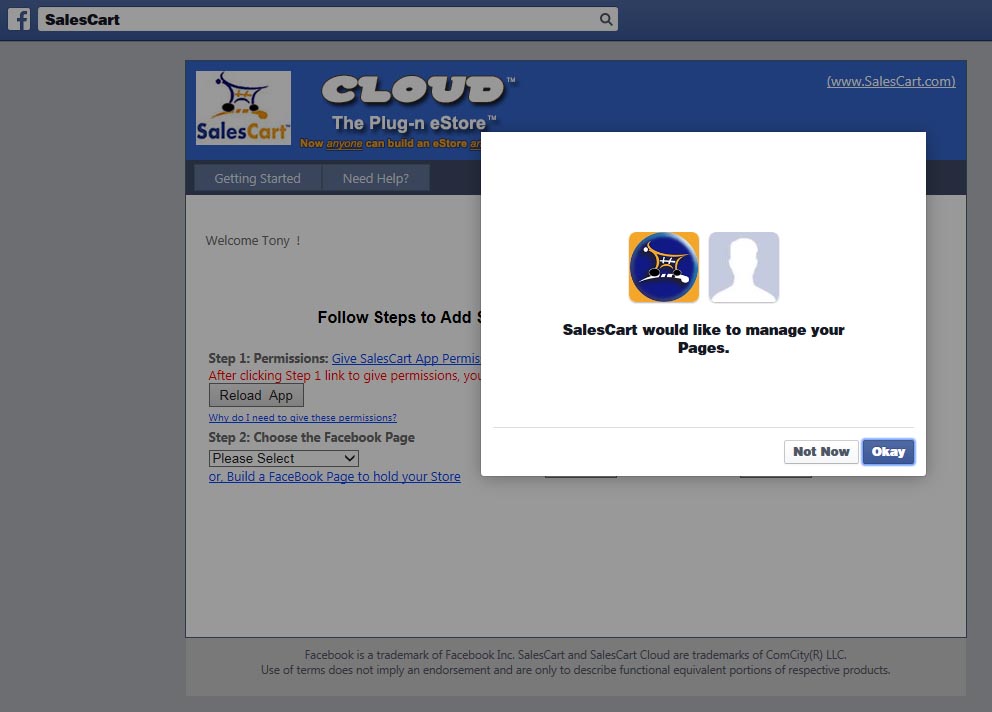 Click Here for Larger Image |
Finishing the Installation of the app: Give the SalesCart app Permissions!
|
|
 Click Here for Larger Image |
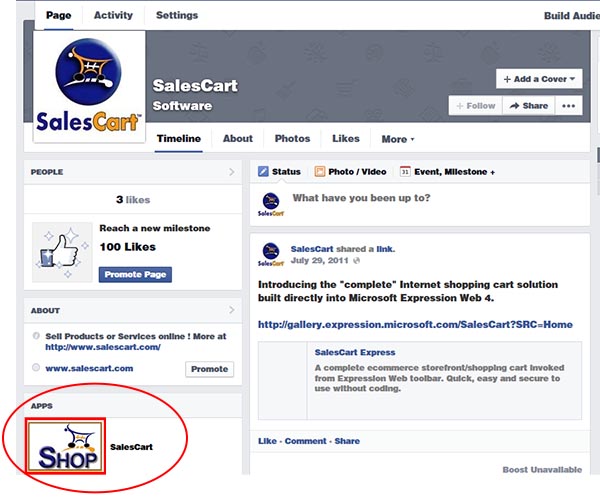
Finishing the Installation of the app: Adding the SalesCart Tab to your Page
|
|
|
Click Here for Larger Image |
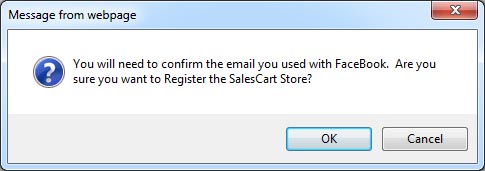
Finishing the Installation of the app: Register the Store
|
|
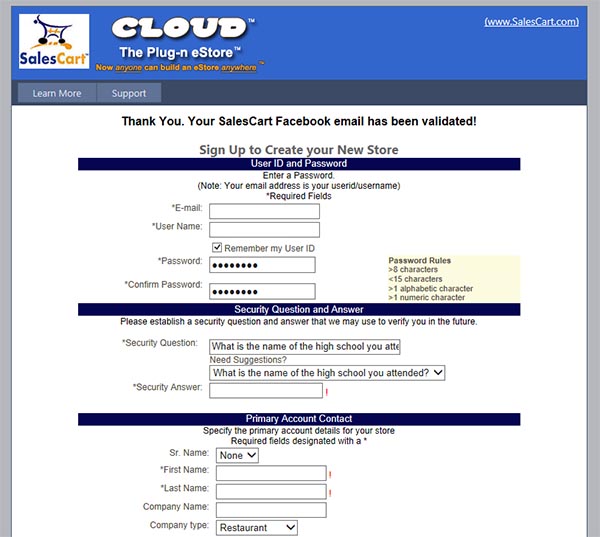
Register and Create the Demo Store
You will be sent an email to validate you are not a bot and to finalize the registration phase of building your store.
| What you are doing | Instructions | |
|---|---|---|
 Click Here for Larger Image |
Accept License
|
|
 Click Here for Larger Image |
Complete Registration: Final Step
|
|
 Click Here for Larger Image |
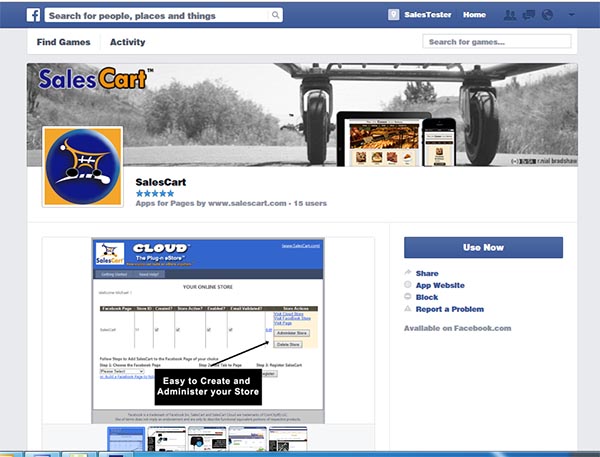
View your Demo Store: Log back into Facebook as a user.
|
|
 Click Here for Larger Image |
View your Demo Store: Visit the Store
|
|
Customizing the Demo Store
The next step is to customize the Default Demo Store. By default, the intial store provided is simply mock-up data for a sandwich shop. You need to customize this demo category and product data for your own products and your own store.

 Reddit